Pages

Wednesday, October 31, 2012

Sunday, October 21, 2012

Halloween Hairstyles

          These are some Halloween hairstyles that I made up.
#1
Candy Corn
The pictures pretty much explain the whole thing.


#2
Pumpkin
This one I was just playing around, so I didn't take pictures. But I parted her hair in the middle and started to dutch braid a little piece on the left side of her part and curved it around the part. Then I just dutch braided the rest of her hair into a circle shape.


#3
Spider Web-ish
This one was very easy and fast. Make 3 ponytails in front of her face. Bring those three ponytails to the back and make another ponytail. Then you can leave the hair down, pull it into a ponytail, or pull it into pigtails. We just did a ponytail.


ENJOY!!!!!!
~Kailey

Saturday, October 20, 2012

Curlformers


I just thought you would like to see how curlformers looked on thick hair......
they work!
Those were only in her hair for a few hours.

ENJOY!!!!!!
~Kailey

Twist Ponytails into High Messy Buns


 Start by sectioning off 3 parts of the hair.


 Leave the bottom section down and make two ponytails at the bottom.
 Twist the two ponytails together and put 2 more ponytails in.
 It should look like this now:
Repeat those steps up and in the front. Then make messy buns.
This does take some time, so this isn't one to do when you are in a hurry.


   ENJOY!
~Kailey

Friday, October 5, 2012

Dutch Wrap Around and a Bun


This one I didn't get any pictures on but it is really easy.
All you have to do is a wrap around dutch braid and a 
Enjoy!

~Kailey

Friday, September 7, 2012

Topsy Tails

    So about a week ago I got a topsy tail......well it was a different brand. I got it on Amazon. The first time I used it on myself, it snapped. I was so mad. (I thought it was kind of funny that it came in a foreign language)


   Then we got the real topsy tail. The real topsy tail has a thicker handle and is way sturdier. But it is still flexible. We got the real topsy tail at Ulta.

    So if you want to get a topsy tail......make sure you get the topsy tail brand.
    We will post some fun hairstyles using the topsy tail!
I hope this was helpful!
~Kailey

Thursday, August 30, 2012

Quick and Easy Messy Bun

This bun takes like 2 minutes to do. It is so easy.

So first, make a regular ponytail.


 Then gather all of the hair into kind of a messy ball and wrap a colored or clear elastic around the ball twice.
It should look like this now.


 Stretch that ball out and bobby pin as needed.
 Add a bow or flower......
and your done!


Cute, Fast, and Easy!

~Kailey

Wednesday, August 29, 2012

Pin Curls with a Messy Bun

So, today for school I tried this hairstyle that I got from cutegirlshairstyles.
It is really cute and easy to do on yourself or on someone else. I got so many compliments on it today:).


~Kailey

Monday, August 20, 2012

Ponytails into high buns


I got this hairstyle from THIS website.

Sorry I didn't take pictures, but it is pretty easy to understand.
So first you have her tip her head down, so you can make 6 ponytails.
Once you have the 6 ponytails, take the bottom 2, bring them up and secure it with a ponytail. Then add the next 2 ponytails to the first ponytail. Do the same with the top ones. Split the top ponytail in half.
In the front, part her hair on the side and do a french braid. Add the french braid to one of the buns.
Make 2 messy buns and add some bows (optional) and your done!


ENJOY!

~Kailey:D

Braided Half Up


Sorry I haven't posted in a while. I have been kind of busy:).
So anyway, first you want to separate the hair out. Probably either in half or in thirds.


Then separate the hair so there are 2 pieces hanging and pull the rest up.


Braid those and then make the ponytail with the braids.


Thats it!
Enjoy!

~Kailey :D

Saturday, July 7, 2012

Wrap Around French Braid #2


This style is great because it is fast and easy.
So let's get started.
First, grab a big section on either side of the head.... Like from the front of the head to about the back of the ear.


Then split that section into three parts and begin a regular braid.


About one or two plaits in, start adding big sections to make it a french braid. You want to keep it as low as possible on the head.


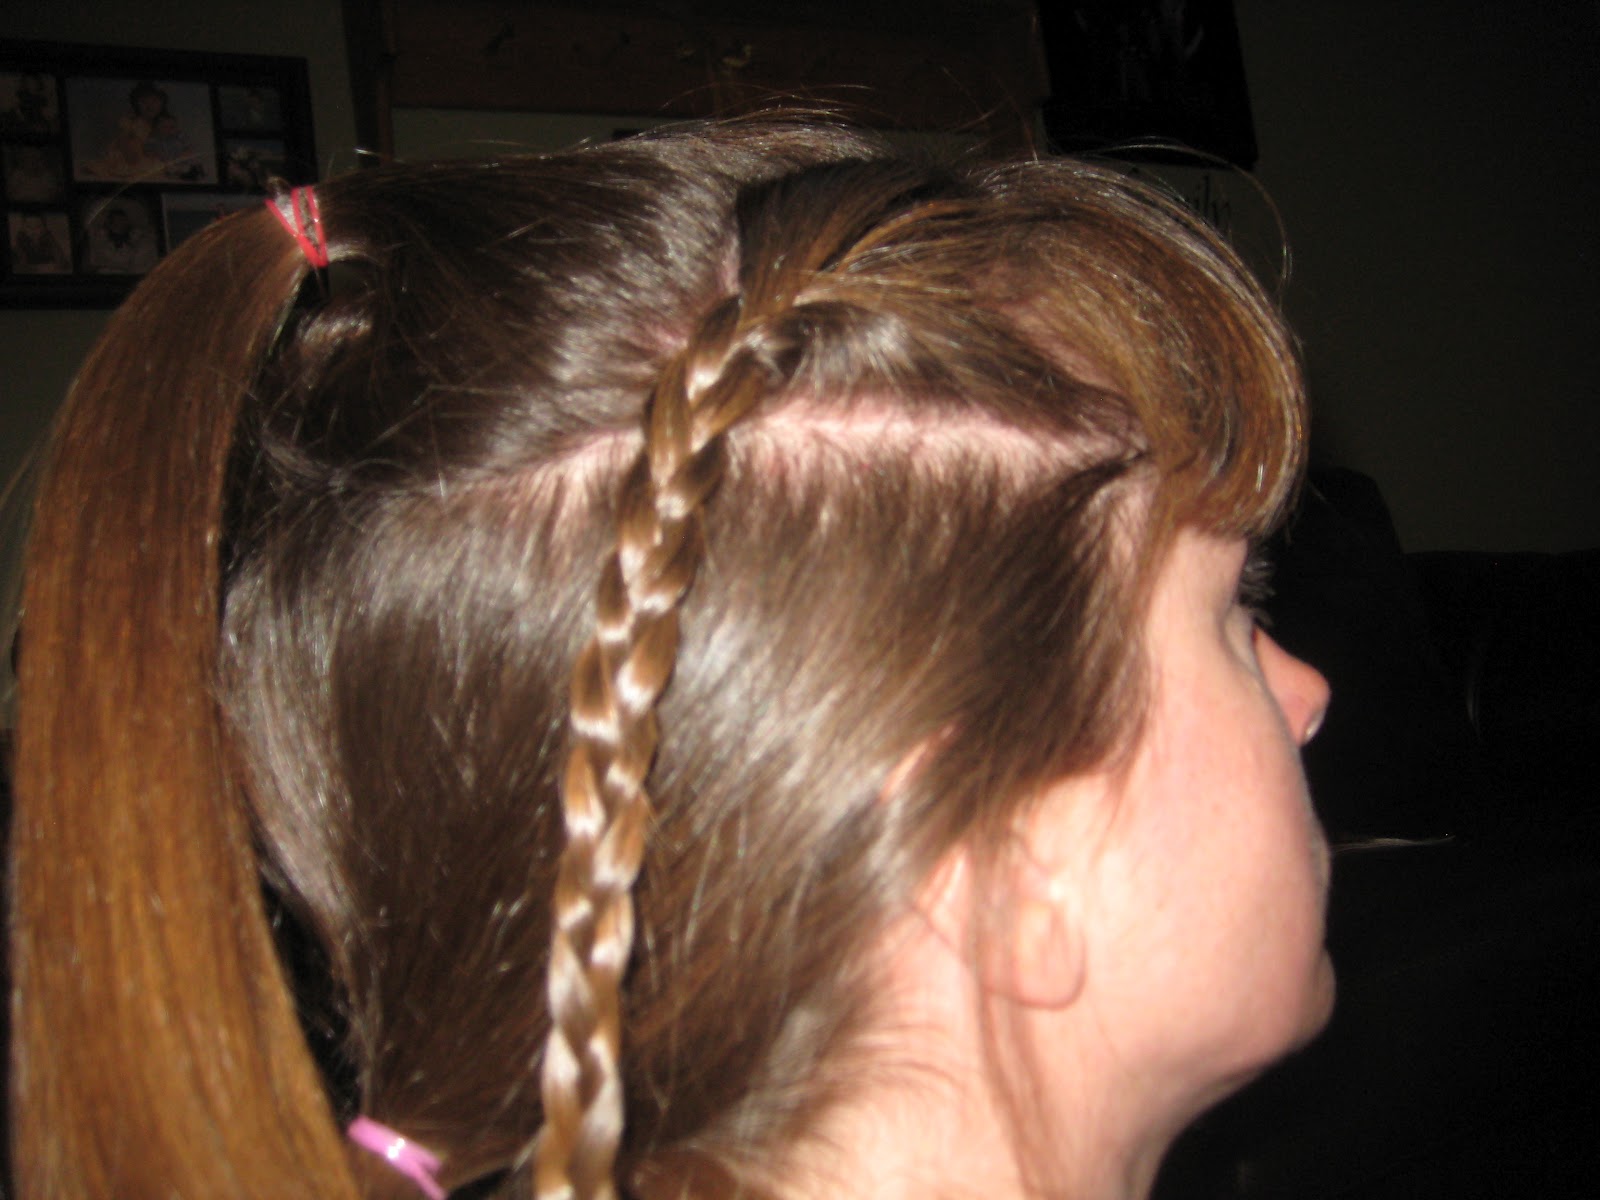
This is how it should look so far. If you are having troubles keeping the braid low to the head, that is okay, it will just be a little bit higher.


When I got just about behind the ear on the other side, I ran out of hair to add to the bottom, so I only added from the top. You don't have to do that.


At the end, you could continue the braid, or you can just make it a side ponytail  like I did.


Back View:


Right Side:


Left Side:


ENJOY!

~Kailey:D

Friday, July 6, 2012

New Look

    Here is the new look of 2 SISTERS HAIRSTYLES!
I hope you like it.


~Kailey

Saturday, June 23, 2012

The Barbie Bun


So Alyssa wanted her hair like Barbie today. So she picked out a hairstyle in a Barbie movie. This was the one she picked out:


I knew I couldn't get it that high, but I thought I could make it look kind of like it.
So first.....this is optional......make a lot of flip ponytails in the front and make a high ponytail.


Then you take small pieces of hair out of the ponytail and roll them into little loops and bobby pin them until you run out of hair.


You can also stop halfway through and curl the straight pieces for kind of a half up look. But we wanted it to look like the barbie.


Back View:


Right Side:


Left Side:


Top View:


Front View:


ENJOY!

~Kailey